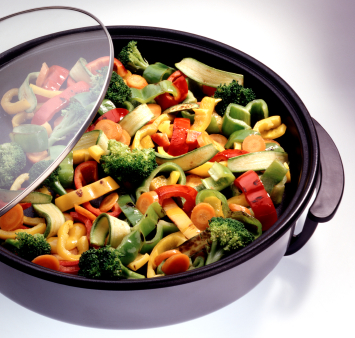
Updated: 4/10/19
7 Tips for Using a Slow Cooker
The slow cooker can be your best kitchen tool - allowing you to multitask while it does the cooking work for you, but you can run the risk of ending up with a mushy meal that's not quite right. Use these tips for what to do and what to avoid to ensure you've got a winner every time. You’ll save time, effort and deliver all sorts of deliciousness every time!
1. Plan Your Meals Ahead
If you want to turn your slow cooker on first thing in the morning, a little planning goes a long way.
The night before: Cut and trim any meat, chop any vegetables, measure out dry ingredients and prepare any sauce; refrigerate the items in separate containers. Do not refrigerate the components in the ceramic slow cooker insert, as a cold insert takes too long to heat up and will affect cooking time and food safety.
In the morning: Add ingredients to the slow cooker according to the recipe. If you won’t be home close to the end of the cooking time, make sure you have a slow cooker that can switch to a “warm” setting when cooking is done.
2. Avoid Overcooking Lean Meats
A long cooking time could cause stringiness, so aim for a shorter stint and extra liquid to prevent lean meats like pork tenderloin or chicken breasts from overcooking.
3. Layer Food Properly
Remember that the slow cooker’s heat source is directly on the bottom. Foods that take the longest to cook need to be placed into the slow cooker first to absorb the most heat. This usually translates into tougher cuts of meat and root vegetables like sweet potatoes. This same thought process also holds true for more delicate, quick-cooking veggies like bell peppers or chopped string beans being layered at the top of the slow cooker pot during the last 30 minutes, so they don’t turn into overcooked mush.
4. Don’t Overfill the Slow Cooker
When it comes to adding food into the slow cooker, always try to err on the side of “less is more”, aiming to fill the ceramic container around two-thirds full. Instead of simmering, filling the slow cooker to the top allows the food to steam, resulting in a longer cooking time and food that isn’t quite as tasty.
5. Keep the Lid Closed!
Resist the urge to take off the lid and peek at your meal. Opening the slow cooker lets the heat escape and slows the cooking process. Only open it 30 to 45 minutes before the low end of the cooking range to check for doneness.
6. Add Herbs at the End
Add your fresh herbs to your slow cooker during the last 30 minutes otherwise they’ll wilt. Herbs and even dairy can’t handle the temperature and long cooking times of a slow cooker.
7. Let Liquid Boil Off
Some vegetables like onions release too much liquid in slow cooker recipes, making the cooking sauce too thin. If the meat is cooked and you were aiming for more of a gravy-consistency from the dish’s sauce, place the slow cooker on a high setting and remove the lid for 30 to 45 minutes. This will allow the extra moisture in the sauce to boil off.
Put your Slow Cooker to work with these tasty recipes!
Servings:
3 Vegetables
1 Starch
Ingredients:
1 Bell Pepper, sliced
½ medium Sweet Potato, peeled and cut into cubes
1 cup Zucchini, cut into thick slices
½ Tbsp Extra Light Olive Oil
Freshly Ground Black Pepper, to taste
1 Tbsp finely chopped Herbs of choice
¼ Garlic Clove, peeled
Preparation:
Spray the inside of crock pot with unflavored nonstick spray. Add your vegetables, seasonings, herbs, oil and mix together until vegetables are well coated. Cook 3 hours on low, stirring once every hour.
Servings:
1 Protein
2 Vegetables
1 Starch
Ingredients:
1 serving pre-soaked Venison Roast
½ cup sliced Carrots
½ medium Sweet Potato, cut into cubes
½ cup Celery, chopped
¼ medium Onion, sliced
½ tsp. Salt Free Creole Seasoning
1 Bay Leaf
Freshly ground black pepper
Preparation:
Soak venison roast the day before in water with 2 tsp. of vinegar and then regular water the night before. Place vegetables in the bottom of crock pot. Place soaked venison on top of vegetables. Add water to crock pot. Add seasonings and bay leaf. Cook on low setting 7-9 hours. Remove bay leaf and serve.


